

Hello Munchkins! Wanna make the most famous witches of Oz? I'm here to share with you the pattern for these Glinda and Elphaba dolls. It's a fairly simple pattern and being small they work up pretty quick.
For this project I used: 3 mm crochet hook, 8 mm safety eyes, stuffing, stitch marker,tapestry needle and DK yarn, for Elphaba the following colors: green 10 g, black 20 g, dark brown 10 g, a little bit of white. For Glinda the colors needed are: skin color 10 g, pink 10 g, yellow 10 g, a little bit of gray and white.
The dolls are going to measure 12 cm / 4,7 inches without the hat or the crown.
If you want a pdf version of this pattern you can find it in my Etsy shop: https://hisheepok.etsy.com/listing/1875158669/glinda-and-elphaba-wicked-crochet
mr: magic ring
ch: chain
sl st: slip stitch
sc: single crochet
hdc: half double crochet
inc: increasedec: decrease
**: repeat to the end of round
(...) x...: repeat the inside of parentheses according to the indicated number, example: (...) x2
[...] total stitches at the end of round
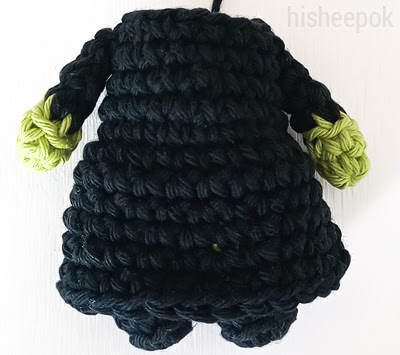
BODY:
The body is the same for both dolls, the only thing that changes is the colors used for each.
FIRST LEG:
Start with black for Elphaba. Start with pink for Glinda.
R1: 8 sc in mr
R2: back loop only 8 sc [8]
Change to green for Elphaba. Change to skin color for Glinda.
R3-5: 8 sc [8]
Cut the yarn leaving a short tail.
SECOND LEG:
Repeat first leg from R1-5 but don't cut the yarn.
JOINING LEGS:
Continuing from the second leg. Change color to black for Elphaba. Change color to pink for Glinda.
R6: 4 sc, 2 ch, 1 sc on the first stitch of the first leg to join, 7 sc on first leg, 2 sc on chains, 4 sc on second leg [20]
TORSO:
R7-8: 20 sc [20]
R9: back loop only 20 sc [20]
R10: 20 sc [20]
R11: 4 sc, sc dec, 8 sc, sc dec, 4 sc [18]
R12: 18 sc [18]
R13: *7 sc, sc dec* [16]
Cut the yarn leaving enough for sewing.


Turn the body upside down and join yarn on any of the loops left from R9. Try to keep a loose tension so we don't squeeze the body.
FIRST LAYER:
R1: 1 sc into each loop around [20]
R2: back loop only 20 sc [20]
R3: *hdc inc* [40]
R4: 40 hdc [40]
Cut the yarn and secure the ends.
SECOND LAYER:
Again, with the body upside down, join yarn on any of the loops left from R2 of the first layer.
R1: *hdc inc* [40]
Cut yarn, secure and hide ends.


ELPHABA DRESS:
Turn the body upside down and join yarn on any of the loops left from R9. Try to keep a loose tension so we don't squeeze the body.
R1: 1 sc into each loop around [20]
R2-4: 20 sc [20]
R5: *3 sc, sc inc* [25]
R6: 25 sc [25]
Cut yarn, secure and hide the ends.
Turn the body upside down and join yarn on any of the loops left from R9. Try to keep a loose tension so we don't squeeze the body.
R1: 1 sc into each loop around [20]
R2-4: 20 sc [20]
R5: *3 sc, sc inc* [25]
R6: 25 sc [25]
Cut yarn, secure and hide the ends.

GLINDA ARMS:
Make two.
I did not stuff them as they are very small.
With skin color.
R1: 6 sc in mr
R2-3: 6 sc [6]
R4: 1 sc, sc dec, 3 sc [5]
R5: 2 sc , sc dec, 1 sc [4]
Cut yarn leaving enough for sewing.
Sew arm to the sides of the body between R12-13.
Make two.
I did not stuff them as they are very small.
With skin color.
R1: 6 sc in mr
R2-3: 6 sc [6]
R4: 1 sc, sc dec, 3 sc [5]
R5: 2 sc , sc dec, 1 sc [4]
Cut yarn leaving enough for sewing.
Sew arm to the sides of the body between R12-13.


ELPHABA ARMS:
Make two.
I did not stuff them as they are very small.
Start with green.
R1: 6 sc in mr
R2: 6 sc [6]
Change to black.
R3: back loop only 6 sc [6]
R4: 1 sc, sc dec, 3 sc [5]
R5: 2 sc , sc dec, 1 sc [4]
Cut yarn leaving enough for sewing.
Sew arm to the sides of the body between R12-13.
Make two.
I did not stuff them as they are very small.
Start with green.
R1: 6 sc in mr
R2: 6 sc [6]
Change to black.
R3: back loop only 6 sc [6]
R4: 1 sc, sc dec, 3 sc [5]
R5: 2 sc , sc dec, 1 sc [4]
Cut yarn leaving enough for sewing.
Sew arm to the sides of the body between R12-13.

HEAD:
The head is the same for both.
With green for Elphaba. With skin color for Glinda.
R1: 6 sc in mr
R2: *sc inc* [12]
R3: *1 sc, sc inc* [18]
R4: *2 sc, sc inc* [24]
R5: *3 sc, sc inc* [30]
R6-11: 30 sc [30]
R12: *3 sc, sc dec* [24]
Place eyes between R9-10, four stitches apart.
R13: *2 sc, sc dec* [18]
R14: *1 sc, sc dec* [12]
R15: *sc dec* [6]
Cut yarn, tie off.
With white yarn outline the bottom of each eye.
For the nose make a horizontal line between R10-11 centered between the eyes, with green for Elphaba and skin color for Glinda.
Make the eyebrows between R8-9 above the eyes, with dark brown for Elphaba and with yellow for Glinda.


GLINDA HAIR:
With yellow.
R1: 6 sc in mr
R2: *sc inc* [12]
R3: *1 sc, sc inc* [18]
R4: *2 sc, sc inc* [24]
R5: *3 sc, sc inc* [30]
R6-10: 30 sc [30]
From here we'll start making the hair strands, so, once R10 is finished, sl st on next st,
For the first 6 strands: chain 21, make 1 sl st on ch, then 19 sc on chain, skip the next stitch of the hair and place a sl st on next st. Repeat this until you have 6 strands.
For the following strands: chain 10, make 1 sl st on ch, then 8 sc on chain, skip the next stitch of the hair and place a sl st on next st. Repeat this until you have 8 strands of this length.
Cut the yarn leaving some for sewing.
Put the hair on the head, centering the six longer strands on top, we want the front of the hair to sit between R5-6. Check that there's about the same distance from the side of the eye on both sides. Sew a few stitches to secure in place, leave the long strands loose.
Arrange the long strands so you have three to the right and three to the left, 'style' them as you see fit, placing the outermost strand of each side over the other two. Sew a few stitches to secure.


GLINDA CROWN:
With gray.
17 ch
R1: 16 sc [16]
R2: 1 ch, turn, 5 sl st, 2 ch, 1 sc on ch, (2 sl st, 2 ch, 1 sc on ch) x3, 5 sl st
Cut the yarn leaving some for sewing.
Sew the ends of the piece together to form a circle, place the crown on top of the head and secure it in place.
With gray.
17 ch
R1: 16 sc [16]
R2: 1 ch, turn, 5 sl st, 2 ch, 1 sc on ch, (2 sl st, 2 ch, 1 sc on ch) x3, 5 sl st
Cut the yarn leaving some for sewing.
Sew the ends of the piece together to form a circle, place the crown on top of the head and secure it in place.
Sew the head to body.


ELPHABA HAIR:
With dark brown.
R1: 6 sc in mr
R2: *sc inc* [12]
R3: *1 sc, sc inc* [18]
R4: *2 sc, sc inc* [24]
R5: *3 sc, sc inc* [30]
R6-10: 30 sc [30]
When you finish round 10, make 13 ch, cut the yarn leaving a short tail
Now, chain 13, place a sl st into the next stitch of the hair and again, chain 13. Cut the yarn leaving a short tail. Repeat this two more times, so at the end we have 7 chains coming out the hair. Then, knot each of the chains ends to make sure they'll be secure and won't come undone and cut the excess yarn.
Grab the first chain and wrap it around the others, from top to bottom and pull the end through the loop you made by wrapping it. Alternatively, you can use a strand of yarn and use it as a hair tie.
Put the hair on the head, we want the front of the hair to sit between R5-6, the ponytail downwards on the back. Check that there's about the same distance from the side of the eye to the hair on both sides. With a strand of dark brown yarn sew a few stitches to keep it in place.
Now, sew the head to the body.


ELPHABA HAT:
With black.
R1: 6 sc in mr
R2: *1 sc, sc inc* [9]
R3: 9 sc [9]
R4: *2 sc, sc inc* [12]
R5: 12 sc [12]
R6: *1 sc, sc inc* [18]
R7: 18 sc [18]
R8: *2 sc, sc inc* [24]
R9: 24 sc [24]
R10: *3 sc, sc inc* [30]
R11: 30 sc [30]
R12: *4 sc, sc inc* [36]
R13-14: 36 sc [36]
R15: front loop only *5 sc, sc inc* [42]
R16: *6 sc, sc inc* [48]
R17: 48 sc [48]
Cut yarn, secure and hide end.


We are done, ready for a trip to Emerald City!!!


Join me:
Instagram https://www.instagram.com/hisheepok
Pinterest https://pinterest.com/hisheepok
If you have any questions or thoughts do not hesitate to leave a comment.
This pattern is for personal use only. Please do not post this pattern to your website or blog, instead post a link to https://hisheepok.blogspot.com/2025/02/glinda-and-elphaba.html
If you post a photo of the amigurumi made with this pattern in the web I would appreciate it if you tag me, I'm @hisheepok, use the hashtag #hisheepok or put a link to my blog.
Beautiful and creative.
ReplyDeleteHi! Would this work with medium weight yarn?
ReplyDeleteHey! Sure, you can use whatever yarn you have, you'll need to adjust the crochet hook to the yarn weight too and maybe check if you want to change the eye size too.
DeleteI'm making these for my cousin as a Xmas present, and they are going really well so far, so good xx
ReplyDeleteThat's great! Hope you enjoy, happy holidays!!
DeleteHi i was wondering if you accept the sell of the finished product, srry if its a burden and your work its beautiful 🩵
ReplyDeleteHi Kat, I've got no problem with the selling of the finished product, I do ask, when you post it on a website or socials mention Hi Sheep as the pattern designer. Thank you!
Delete