

Getting into the december mood with this pattern! This cute guy is sure to bring anyone a little christmas cheer. So to make a Merry little frog I used: 3 mm hook, stuffing, tapestry needle, 6 mm safety eyes and Yarn Dk green 20g, red 10g, white 5g, black 5g a little bit of pink, yellow and some black embroidery floss.
The frog is going to measure 14,5 cm / 5,7 inch.
mr: magic ring
ch: chain
sl st: slip stitch
sc: single crochet
(...) x...: repeat the inside of parentheses according to the indicated number, example: (...) x2
[...] total stitches at the end of round
[...] total stitches at the end of round
HEAD:
With green.
R1: 6 sc in mr
R2: *sc inc* [12]
R3: *1 sc, sc inc* [18]
R4: *2 sc, sc inc* [24]
R5: *3 sc, sc inc* [30]
R6: *4 sc, sc inc* [36]
R7: *5 sc, sc inc* [42]
R8-11: 42 sc [42]
R12: *5 sc, sc dec* [36]
R13: *4 sc, sc dec* [30]
R14: *3 sc, sc dec* [24]
R15: *2 sc, sc dec* [18]
R16: *1 sc, sc dec* [12]
R17: *sc dec* [6]
Break yarn and close.

EYES:
Don't stuff.
Make two.
With green.
R1: 5 sc in mr
R2: *sc inc* [10]
R3: 10 sc [10]
Break yarn leaving enough for sewing.
Place safety eyes between R3-4.
Sew the eyes on the head between R3-7. Don't sew them flat but a little oval shaped.
With pink yarn make two lines for the cheeks between R9-10 and with embroidery floss a small mouth between R10-12.


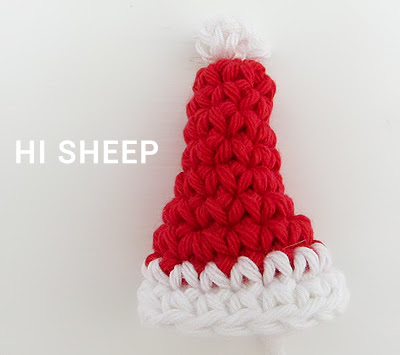
HAT:
With red.
R1: 6 sc in mr
R2: 6 sc [6]
R3: *1 sc, sc inc* [9]
R4-5: 9 sc [6]
R6: *2 sc, sc inc* [12]
R7: 12 sc [12]
R8: *2 sc, sc inc* [16]
Change to white.
R9-10: 16 sc [16]
Break yarn leaving enough for sewing.
With red.
R1: 6 sc in mr
R2: 6 sc [6]
R3: *1 sc, sc inc* [9]
R4-5: 9 sc [6]
R6: *2 sc, sc inc* [12]
R7: 12 sc [12]
R8: *2 sc, sc inc* [16]
Change to white.
R9-10: 16 sc [16]
Break yarn leaving enough for sewing.

POMPOM:
With white.
In a mr repeat (2 ch, 1 sl st) x5
Pull the ring closed, break yarn.
We'll have this little flower looking thing, so to make it look more like a pompom we'll bunch it up and sew it, making the outsides go upwards instead of flat. Sew the pompom to the start of the hat.
You can leave the hat as it is or if you want you can fold the top and sew a few stitches to get the droopy look.
Now, sew the hat to the head between the eyes, and slightly towards the back.

BODY:
Start with green.
R1: 6 sc in mr
R2: *sc inc* [12]
R3: *1 sc, sc inc* [18]
R4: *2 sc, sc inc* [24]
R5: *3 sc, sc inc* [30]
R6-7: 30 sc [30]
Change to white.
R8: 30 sc [30]
Change to red.
R9: *3 sc, sc dec* [24]
Change to black.
R10: 24 sc [24]
Change to red.
R11: 24 sc [24]
R12: *2 sc, sc dec* [18]
R13: 18 sc [18]
Break yarn leaving enough for sewing.
For the little belt buckle, with yellow yarn make two or three horizontal lines on R10.

ARMS:
Stuff lightly at the beginning.
Make two.
Start with green.
R1: 5 sc in mr
R2: *sc inc* [10]
R3: 10 sc [10]
Change to white.
R4: 10 sc [10]
Change to red.
R5: 10 sc [10]
R6: *3 sc, sc dec* [8]
R7-8: 8 sc [8]
R9: *2 sc, sc dec* [6]
R10: 1 ch, turn, flatten the piece and close it up working 3 sc
Break yarn leaving enough for sewing.
Sew the arms on the sides of the body between R12-13.

LEGS:
Stuff very lightly only at the beginning.
Make two.
With green.
R1: 6 sc in mr
R2: *sc inc* [12]
R3-5: 12 sc [12]
R6: *4 sc, sc dec* [10]
R7-9: 10 sc [10]
R10: 1 ch, turn, flatten the piece and close it up working 5 sc.
Break yarn leaving enough for sewing.
Sew the legs on the sides of the body between R4-8.
Now we have the arms and legs on the body, sew the head to the body.


COLLAR:
With white.
22 ch
R1: 21 sc
Break yarn leaving enough for sewing.
Sew the collar to the neck with the ends at the front of the body and a stitch separating them.
With white.
22 ch
R1: 21 sc
Break yarn leaving enough for sewing.
Sew the collar to the neck with the ends at the front of the body and a stitch separating them.

How to crochet Merry the Christmas Frog on youtube:
Join me:
Instagram https://www.instagram.com/hisheepok
Pinterest https://pinterest.com/hisheepok
If you have any questions or thoughts do not hesitate to leave a comment.
This pattern is for personal use only. Please do not post this pattern to your website or blog, instead post a link to https://hisheepok.blogspot.com/2023/12/merry-christmas-frog.html
If you post a photo of the amigurumi made with this pattern in the web I would appreciate it if you tag me, I'm @hisheepok, use the hashtag #hisheepok or put a link to my blog.
No comments:
Post a Comment