Hi, would you like a cup of coffee? by Hi Sheep. In addition to a mug we'll also make a cupcake.
We'll need a 3 mm crochet hook, stitch marker, scissors, tapestry needle and yarn: lilac 35 g, white 25 g, beige 20 g, turquoise 15 g.
The mug is going to measure 9 cm / 3,5 inch tall and 7,5 cm / 2,9 inch diameter, the cupcake 8 cm / 3,1 inch tall.
ABBREVIATIONS (U.S.):
R: round
ch: chain
mr: magic ring
sl st: slip stitch
sc: single crochet
hdc: half double crochet
inc: increase
dec: decrease**: repeat to the end of round
(...) x...: repeat the inside of parentheses according to the indicated number, example: (...) x2
[...] total stitches at the end of round
MUG:
Start with white.
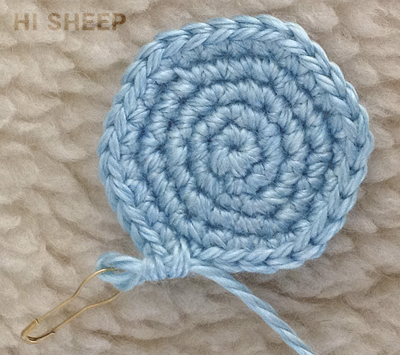
R1: 6 sc in mr
R2: *sc inc* [12]
R3: *1 sc, sc inc* [18]
R4: *2 sc, sc inc* [24]
R5: *3 sc, sc inc* [30]
R6: *4 sc, sc inc* [36]
R7: *5 sc, sc inc* [42]
R8: 42 sc back loop only
R9-24: 41 sc, 1 sl st
Change color to lilac.
R25: sc inc, 20 sc, sc inc, 20 sc [44]
R26-42: 44 sc
R43: 42 sc, 2 sl st
Secure and hide loose ends.
MUG HANDLE:
R1: 6 sc in mr
R2: 6 sc back loop only
R3-21: 6 sc
Sew one end of the handle between R27-29 of the mug and the other end between R37-39.
Once the handle is in place fold the "tube" which is the "mug" inwards where the color changes.
MUG BASE:
R1: 6 sc in mr
R2: *sc inc* [12]
R3: *1 sc, sc inc* [18]
R4: *2 sc, sc inc* [24]
R5: *3 sc, sc inc* [30]
R6: *4 sc, sc inc* [36]
R7: (3 sc, sc inc, 4 sc, sc inc, 3 sc, sc inc, 4 sc, sc inc) x2 [44]
Align the last stitch of the "mug base" with the last stitch of the "mug" and work a round of 44 sl st (slip stitch).
CUPCAKE:
R1: 6 sc in mr
R2: *sc inc* [12]
R3: *1 sc, sc inc* [18]
R4: *2 sc, sc inc* [24]
R5: *3 sc, sc inc* [30]
R6: *4 sc, sc inc* [36]
R7: *5 sc, sc inc* [42]
R8-9: 42 sc
R10: sc dec, 19 sc, sc dec, 19 sc [40]
R11: 9 sc, sc dec, 18 sc, sc dec, 9 sc [38]
R12: sc dec, 17 sc, sc dec, 17 sc [36]
R13: 8 sc, sc dec, 16 sc, sc dec, 8 sc [34]
R14: sc dec, 15 sc, sc dec, 15 sc [32]
R15: 7 sc, sc dec, 14 sc, sc dec, 7 sc [30]
R16: 30 sc
R17: 30 sc back loop only
R18: *3 sc, sc dec* [24]
R19: *2 sc, sc dec* [18]
R20: *1 sc, sc dec* [12]
R21: *sc dec* [6]
Close.
FROSTING:
Foundation: 161 ch
R1: 147 hdc, 2 sc, 1 sl st [160]
Wrap the "frosting" around the top of the "cupcake" starting on R7 towards the center. To keep the "frosting" in place sew 4 stitches distributed along the first wrapped round and from the last stitch you make here pull the yarn across the middle of the "frosting" to the other side.
WRAPPER:
Foundation: 9 ch
R1: 8 sc, 1 ch, turn
R2-35: 8 sc back loop only, 1 ch, turn
Join ends with 8 sc.
WRAPPER BASE:
R1: 6 sc in mr
R2: *sc inc* [12]
R3: *1 sc, sc inc* [18]
R4: *2 sc, sc inc* [24]
R5: *3 sc, sc inc* [30]
Leave enough yarn to sew to "wrapper" using your tapestry needle.
Yummy yummy, hope you enjoy this delicious cupcake and mug.
You can use the cupcake as pincushion and the mug is perfect to store your crochet hooks.
Join me:
Instagram https://www.instagram.com/hisheepok
Pinterest https://pinterest.com/hisheepok
This pattern is for personal use only. Please do not post this pattern to your website or blog, instead post a link to https://hisheepok.blogspot.com/2019/12/mug-cupcake.html
If
you post a photo of the amigurumi made with this pattern in the web I
would appreciate it if you tag me, I'm @hisheepok, use the hashtag
#hisheepok or put a link to my blog.


My granddaughter got a kitchset for Christmas and this will be perfect for me to make for her. Thank you!!
ReplyDeleteI'm so glad you like it! Hope it turns out great!!
DeleteHay ya I'v got a question for round 1&2 if you have a MR with 6 SC than next round SC and inc wouldn't it make 9 stitches in total in stead of 12 it would be 12 tho if you inc instead of SC&Inc the second round.?
ReplyDeleteHey! You'd be placing an inc in each stitch in round 2 so we'll get 12. It is written *sc inc* to indicate you have to increase using single crochet.
DeleteOhhh that make so much sense thank you 😅
DeleteHi! I'm still learning crochet and I'm wondering what "Join ends with 8 sc" means after you crochet the wrapper?
ReplyDeleteThank you :)
Hii, soo sorry for the late reply!! So, what it means is that you'll want to join together the starting chain and the last row of the wrapper. Fold the piece, align the starting chain and the last row and then insert the hook into the stitch of last row and the chain (like second pic of wrapper), complete a single crochet and we'll do that for the eight stitches/chains we got.
DeleteHope that clears it!